How to make a digital flipbook and share it?
In this article we will show you how to make digital interactive flipbooks with pre-designed templates, scenes and themes available in Next FlipBook Maker and then easily share flipbooks online.
Step-by-step guide
1. Download and install Next FlipBook Maker.
2. Click Continue if you haven’t purchased a license code.

3. Click “Create a new Flipbook project”. If you want to view a flipbook demo first, click “Open a demo”.

4. Import a PDF document. You can import all pages or any designated pages. Check the Import Options according to your needs.

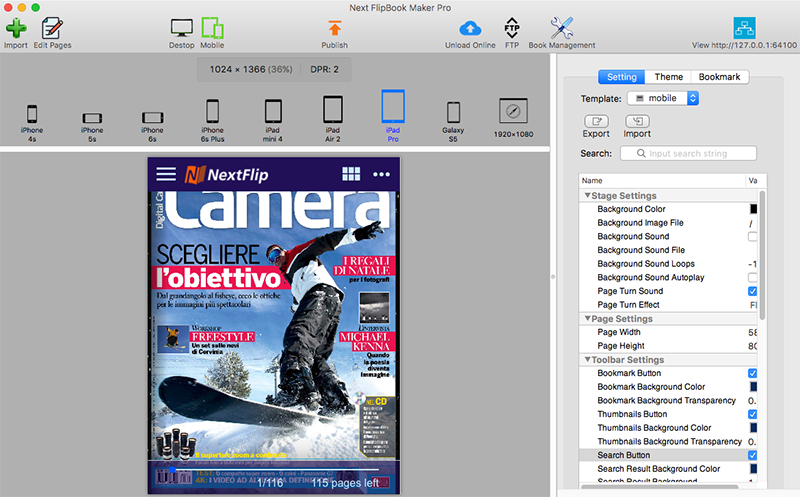
5. Choose a template and scene for you flipbook.
Once a PDF is imported, the page turning effect is added. You can click the Flip button or scroll with the mouse wheel to preview the flipbook. Default template is applied, but you are free to change or customize it. Add background image, background music, logo, Google Analytics ID, etc.Click Mobile icon on the toolbar to preview and edit HTML5 flipbooks. The Responsive Design Mode allows you to preview HTML5 flipbooks across various screen sizes and orientations.
Click Edit Pages button on the toolbar to add line, shape, callout, text, image, music, local video, YouTube video, chart, number icon, button, hyperlink to flipbook pages. Take YouTube as example, select the page you wish to add YouTube video to, click the YouTube video icon on the toolbar and draw a rectangle on the page. You will then find a video player. Enter the YouTube video ID (the code after “v=” in the YouTube video url) to the relevant area on the right side. You can also customize the video player colors and poster image.
6. Here are 4 options to publish your flipbook:
Publish: Publish offline flipbooks: .html, .zip, .app, .exe;Publish Plugin: Publish WordPress Plugin, Joomla module or Drupal Module to install on your WordPress, Joomla or Drupal websites;
Upload Online: Upload to Nextflip Cloud directly; Sign up for free to get a personal Cloud storage account for your digital interactive flipbooks, and instantly share them with unique urls, social networks or embed code.
FTP: Upload to your website with the built-in FTP.